Note, this assumes that you are already familiar with using dd.
I was wondering if you could do a dd image copy through ssh and a network. The answer is: YES! It is a pain in the posterior to have to physically connect backup media to the computer. No mas!
I had some syntax errors when I first tried it, but thanks to Joe S., we got it working. Here is the goodness that makes it work:
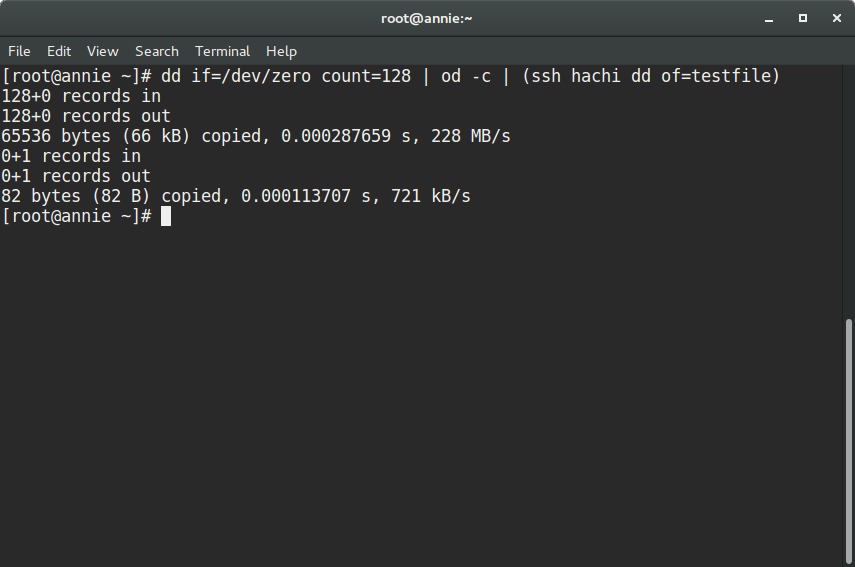
dd if=/dev/zero count=128 | od -c | (ssh [hostname] dd of=testfile)
dd is a utility that converts and copies a file. It it used to backup a partition to an image file. (iso)
I use it to take a snapshot backup of an installed working Linux System for backup purposes. This copies the entire partition (physical copy) though a network connection.
Let’s breakdown the goodness.
/dev/zero writes as many null characters as needed.
count=128 tells how many input blocks should be written. In our case, 128.
You would replace the /dev/zero with the name of the partition to be backed up. /dev/zero is used in this example for testing purposes.
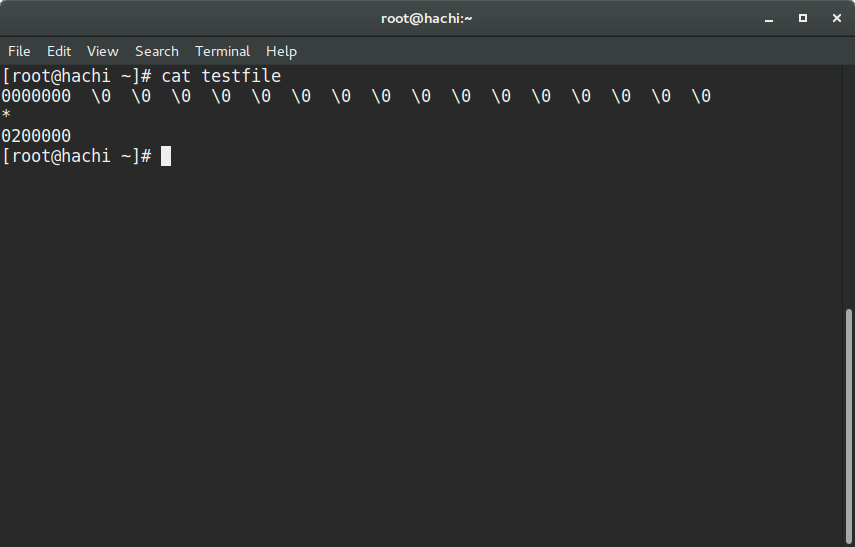
od was not a command that I was familiar with. od takes the file and converts it to octal output. Do not use the od command. This was for the purposes of testing.
The ssh command takes the octal output as supplied by the od command, (note it is getting input from stdin), and directs the output to a file.
Note that this example presumes you have certificate based authentication on the target output host.
The example output looks like:
I will be off for several months due to an impending surgery.